How to measure a room properly (and why it matters so much)
Good design starts with good numbers. A simple, centimetre-by-centimetre guide to measuring your room for a designer.
Tags: How to, Online design, Measuring
Every design I produce starts with a drawing at true scale. That drawing is only as good as the measurements it's built from. A sofa that's 4 cm too wide for the alcove, or a wardrobe that won't clear the door, is almost always a measuring problem rather than a design problem.
The good news is that you don't need any special skill. You need a tape measure, a pencil, your phone and about twenty minutes.
What you'll need
A metal tape measure (a 5 m one is ideal). A laser measure is lovely but not essential.
A sheet of paper and a pencil.
Your phone, for photos.
A second pair of hands, if you have one. It makes long walls much easier.
Measure everything in centimetres, and round to the nearest half-centimetre. Please don't mix feet and centimetres; it's the single most common cause of errors.
Step 1: Sketch the room
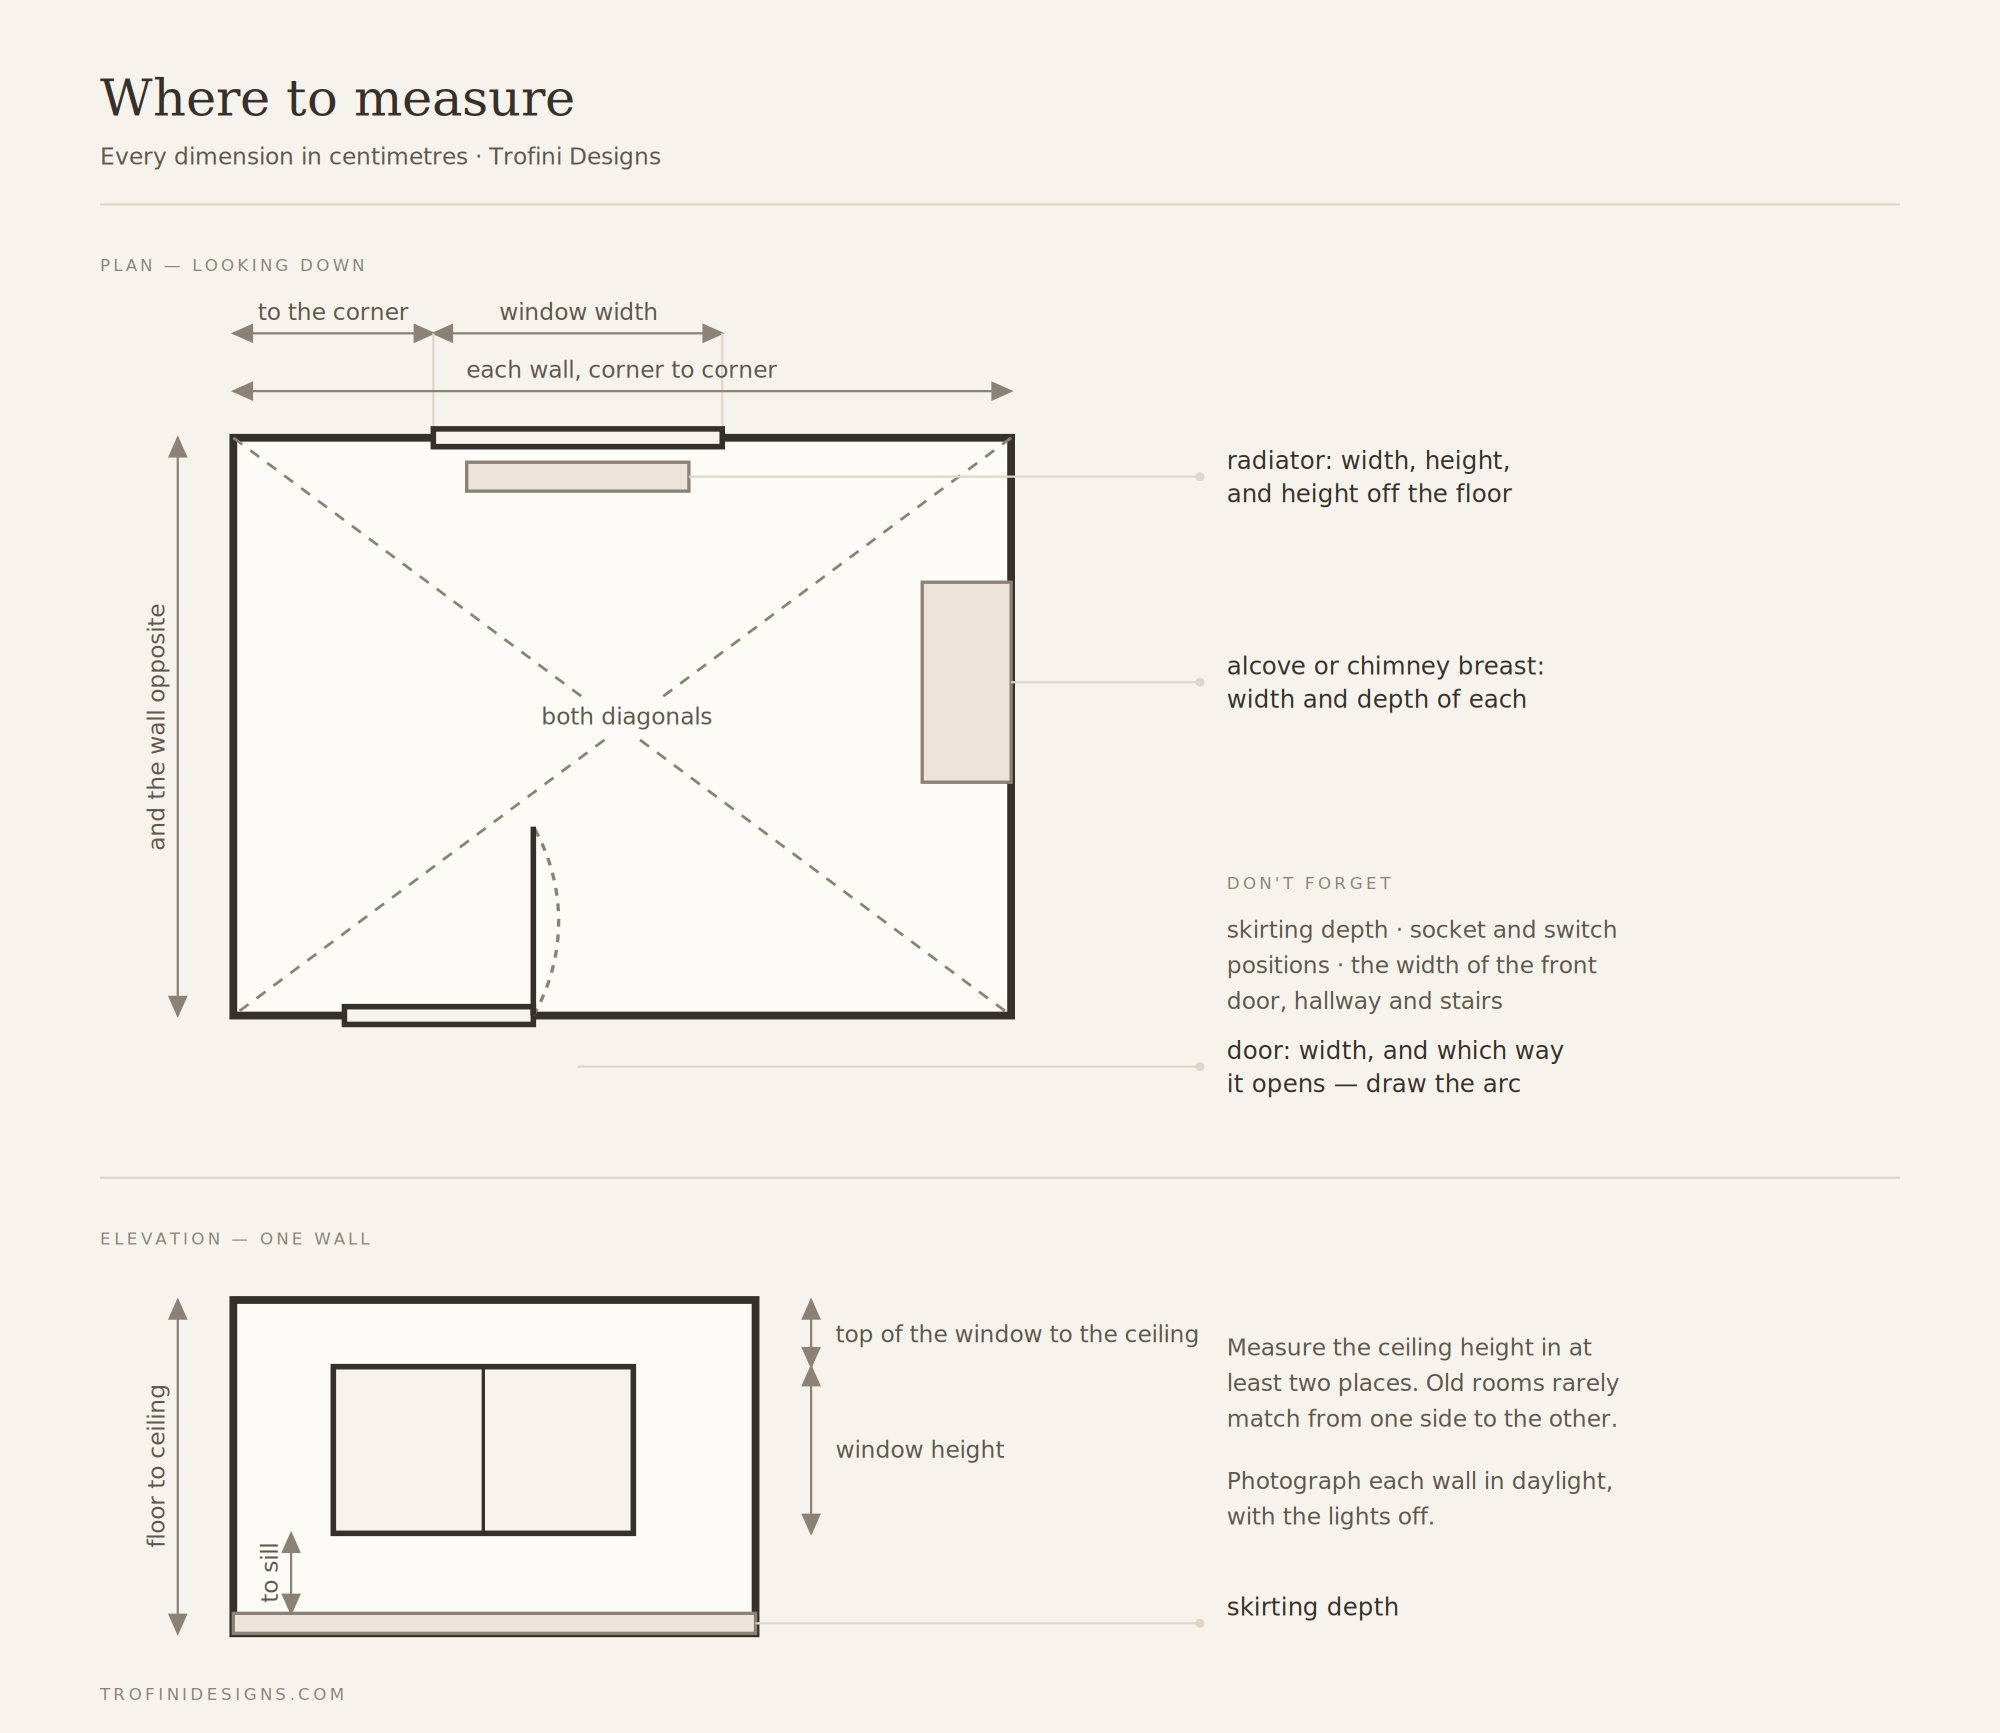
Draw a rough outline of the room from above. It doesn't need to be neat or to scale. Mark doors, windows, radiators, the fireplace and anything built in. This sketch is where you'll write every number.
Step 2: Measure wall by wall
Start in one corner and work clockwise around the room. For each wall, measure corner to corner at about waist height, where the skirting won't get in the way. Write each measurement along the matching wall on your sketch.
Then measure the room diagonally, corner to corner, in both directions. Very few rooms are perfectly square, and the diagonals tell me by how much.
Step 3: Doors and windows
For every door and window, note:
its width and height;
its distance from the nearest corner;
for windows, the height from the floor to the sill, and from the top of the window to the ceiling;
which way each door opens, shown with a small arc on your sketch.
Those last two details decide where furniture, curtains and blinds can actually go.
Step 4: Ceiling height
Measure from floor to ceiling in at least two places. Older London properties often vary by a few centimetres from one side of the room to the other. Note any beams, slopes or dropped sections too.
Step 5: The things people forget
These are the ones that cause trouble later:
Radiators: width, height, and distance from the floor and the corner.
Sockets and switches: roughly where they are, and how high.
Alcoves and chimney breasts: width and depth of each.
Skirting boards: their depth. It matters for built-in joinery.
Access: the width of the front door, hallway and any tight turns on the stairs. A sofa has to get in before it can look good.
Step 6: Photographs
Stand in each corner and photograph the opposite corner, so every wall appears at least twice. Then take close-ups of anything unusual. Photos in daylight, with the lights off, show me the room's natural light.
Send it over
A photo of your annotated sketch and your room photos is all I need. If anything looks odd, I'll ask. If you'd rather not measure at all, I can come and do it for you in London.
For online clients, this sits alongside a short questionnaire about how you use the room. Together they're the foundation of everything that follows.